A Sustainable Guide to Composting with Worms for Healthier Gardens and Less Waste-plantify
Introduction: Why Every Gardener Needs a Worm Farm
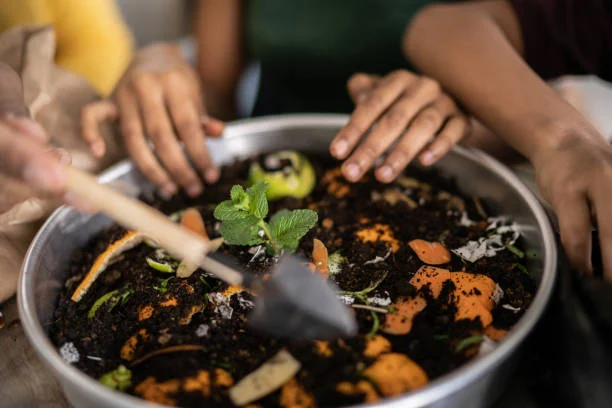
In today's eco-conscious world, reducing waste and nurturing the soil naturally is more important than ever. One of the most effective—and surprisingly simple—ways to do this is by building a worm farm . With a worm composting system, you can transform everyday kitchen scraps into nutrient-rich vermicompost , often referred to as “black gold” in gardening circles.
Vermicomposting not only diverts organic waste from landfills but also gives your plants a powerful natural boost. If you're ready to embrace sustainable living and enrich your garden or potted plants without chemicals, read on to learn how to build your own worm farm step-by-step.
The Benefits of Vermicomposting
Before diving into the how-to, let’s explore why vermicomposting is so valuable:
- Reduces landfill waste : Nearly 20% of landfill waste comes from food scraps and yard trimmings. By composting worms, you keep these materials out of landfills where they would otherwise produce methane, a potent greenhouse gas.
- Improves soil health : Worm castings are rich in nitrogen, phosphorus, potassium, and beneficial microbes that help plants grow stronger and healthier.
- Saves money : You’ll reduce your need for synthetic fertilizers and improve soil structure naturally.
- Perfect for small spaces : Whether you live in an apartment or have a backyard, a worm bin fits anywhere.
If you’re already inspired to start composting, check out our article on how to start an organic backyard garden to complement your new worm farm.
What You’ll Need to Build a Worm Farm
Building a worm farm doesn’t require fancy tools or expensive materials. Here's what you'll need:
- A worm bin : You can buy one or use a plastic storage container with a lid.
- Drill : For making air holes.
- Bedding material : Shredded newspaper, cardboard, coconut coir, or aged straw.
- Kitchen scraps : Fruit and vegetable peels, coffee grounds, tea bags (no dairy, meat, or oily foods).
- Worms : Red wigglers (Eisenia foetida ) are best for composting—they’re fast eaters and thrive in bins.
For tips on choosing the right containers for your garden or worm bin, see our guide on growing vegetables in small pots .
Step-by-Step Guide to Building Your Worm Farm
Step 1: Prepare the Bin
Choose a bin that suits your space and needs. A standard size for beginners is around 18–24 inches deep and wide. Drill small holes (about 1/8 inch) in the lid and sides for ventilation.
Step 2: Add Bedding
Fill the bin halfway with moistened bedding. It should feel like a wrung-out sponge. Fluff it up to create air pockets.
Step 3: Add the Worms
Add your red wigglers to the bin. Start with about 1 pound of worms per square foot of bin surface area.
Step 4: Feed the Worms
Bury food scraps under the bedding. Rotate feeding spots to prevent odors. Avoid citrus, onions, garlic, and spicy foods, which can be too strong for worms.
Step 5: Maintain Your Worm Farm
Check the bin weekly:
- Keep the bedding moist.
- Harvest castings every 2–3 months by moving the finished compost to one side and adding fresh bedding to the other.
For more indoor plant care tips that align with worm composting practices, visit our article on nurturing houseplants in dry climates .
Common Worm Farming Mistakes to Avoid
Even experienced gardeners can make missteps when starting a worm farm. Avoid these common issues:
- Overfeeding : Too much food leads to rotting and fruit flies.
- Incorrect moisture levels : Too wet = smelly; too dry = unhappy worms.
- Wrong worm species : Earthworms from your garden won’t survive in a bin. Stick to red wigglers.
- Using non-compostable items : No meat, dairy, or oily foods.
Using Your Worm Castings
Once harvested, worm castings can be used in several ways:
- Soil amendment : Mix 1 part castings with 4 parts soil for planting beds or pots.
- Compost tea : Steep castings in water overnight to create a liquid fertilizer.
- Top dressing : Sprinkle on top of potting soil for indoor or outdoor plants.
They’re especially effective for boosting the growth of vegetables and herbs grown in containers—perfect if you're trying your hand at urban gardening.
Expand Your Green Lifestyle
Starting a worm farm is just one piece of a larger puzzle of sustainable living. Pair your vermicomposting efforts with other eco-friendly practices like rainwater harvesting, companion planting, or using native plants to support local pollinators.
To dive deeper into green gardening techniques, explore our article on smart irrigation systems that slash water use while keeping your garden thriving.
Conclusion: Transform Waste Into Wonder
A worm farm is more than just a way to dispose of scraps—it’s a gateway to a greener lifestyle, healthier soil, and a flourishing garden. Whether you're an apartment dweller or a backyard gardener, vermicomposting is accessible, rewarding, and easy to maintain.
By turning your kitchen waste into black gold, you're not only helping your plants thrive—you’re also contributing to a cleaner planet. So grab a bin, get some worms, and start composting today!


