How to Grow Microgreens Indoors: A Nutrient-Packed Harvest in Just 7 Days-plantify
Introduction: Why Microgreens Are a Game-Changer for Indoor Gardeners
Microgreens—tiny, nutrient-dense versions of leafy greens and herbs—are a powerhouse of flavor and health benefits. Packed with vitamins, antioxidants, and minerals, these miniature plants are easy to grow indoors, even in the smallest spaces. Whether you’re a seasoned gardener or a beginner, cultivating microgreens in your kitchen offers a rewarding way to enjoy fresh produce year-round. In just 7 days, you can harvest a crop that elevates salads, smoothies, and meals while reducing your environmental footprint.
In this guide, we’ll walk you through the ultimate process to grow microgreens indoors, optimize water use with smart techniques, and troubleshoot common issues. Let’s dive in!
Why Grow Microgreens Indoors?
Indoor gardening eliminates the unpredictability of weather, pests, and soil quality, giving you full control over your microgreens’ growth. Here’s why this method shines:
- Space Efficiency: Perfect for apartments, kitchens, or balconies.
- Year-Round Harvest: Grow fresh greens regardless of outdoor conditions.
- Speedy Growth: Most microgreens mature in 7–14 days.
- Water Efficiency: Combine this practice with smart irrigation [internal link: https://www.plantify.site / smart-irrigation-water-saving-garden ] to slash water use by up to 50%.
What You’ll Need to Start Growing Microgreens
Gather these simple supplies:
- Seeds: Choose fast-growing varieties like broccoli, kale, radish, or arugula. Check out Johnny’s Selected Seeds for organic options.
- Growing Medium: Use organic potting soil or soilless options like coconut coir (peat moss is eco-friendly but less sustainable).
- Containers: Shallow trays (2–3 inches deep), recycled plastic containers, or biodegradable pots.
- Light Source: Natural sunlight (south-facing window) or LED grow lights for optimal growth.
- Watering Tools: A spray bottle or drip irrigation system for gentle hydration.
- Ventilation: A small fan or open windows to prevent mold.
Step-by-Step Guide to Growing Microgreens Indoors
Step 1: Prepare Your Containers
Fill trays with 1–2 inches of moist, organic potting soil. If you’re aiming for a zero-waste approach, reuse food containers with drainage holes [internal link: https://www.plantify.site/reduce-food-waste-composting ]. Loosen the soil to ensure even distribution.
Step 2: Sow the Seeds
Scatter seeds densely but evenly across the soil surface. Press them gently into the soil to ensure contact, but avoid burying them too deeply. For best results, follow seed packet instructions—some varieties (like sunflowers) need soaking beforehand.
Step 3: Water and Cover
Use a spray bottle to moisten the seeds. Cover trays with a lid or damp cloth to retain moisture and encourage germination. Place trays in a warm area (65–75°F) for 2–3 days.
Step 4: Provide Light and Airflow
Once sprouts emerge, move trays to a sunny windowsill or under LED grow lights (12–16 hours daily). Position lights 2–4 inches above the greens to prevent legginess. Use a fan for 2–3 hours daily to strengthen stems and deter mold [external link: https://extension.umn.edu/indoor-gardening-light-requirements ].
Step 5: Water Strategically
Keep the soil consistently moist but not soggy. Bottom-watering (placing trays in shallow water) prevents overwatering and fungal issues. Pair this with smart irrigation techniques [internal link: https://www.plantify.site/smart-irrigation-water-saving-garden ] to conserve water.
Step 6: Harvest in 7–10 Days
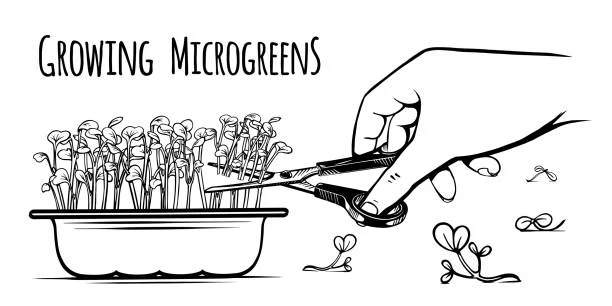
When microgreens reach 1–3 inches tall and develop “true leaves,” they’re ready to harvest. Use clean scissors to cut stems just above the soil line. Rinse and enjoy immediately or store in an airtight container for 5–7 days.
Conclusion: Reap the Rewards of Homegrown Microgreens
Growing microgreens indoors is a simple, sustainable way to boost your diet and reduce grocery bills. By combining this practice with water-efficient gardening [internal link: https://www.plantify.site/smart-irrigation-water-saving-garden ], you’ll contribute to a greener planet while enjoying fresh, nutrient-packed harvests. Share your journey on social media and inspire others to join the movement!
Frequently Asked Questions (FAQs)
Q1: Can I grow microgreens without soil?
Yes! Try hydroponic mats or coconut coir for soilless options.
Q2: Which microgreens are best for beginners?
Radish, broccoli, and sunflower microgreens are fast-growing and resilient.
Q3: How much light do microgreens need?
Aim for 12–16 hours of sunlight or grow light exposure daily.
Q4: Are microgreens safe to eat raw?
Absolutely! They’re commonly eaten raw to preserve nutrients.
Q5: Can I reuse soil after harvesting?
Mix spent soil with compost for outdoor plants to minimize waste.


